
An easy-to-apply method of stair winding that considers both walkability and a harmonious curve.
See how fast it worksAmong the traditional approaches, the angle method is particularly easy to apply and delivers very usable results in many situations. This cannot be said of all methods, especially when it is not a "textbook corner."
Stair winding is therefore about both good walkability of the staircase and a harmonious curve of the stringer, and consequently the railing.
The drawing solution should be done at least on a 1:10 scale and with a sharp pencil; even better and more precise is a standard CAD system, where, for example, beam lengths can be measured directly. A stair design program works in much the same way, only automatically.
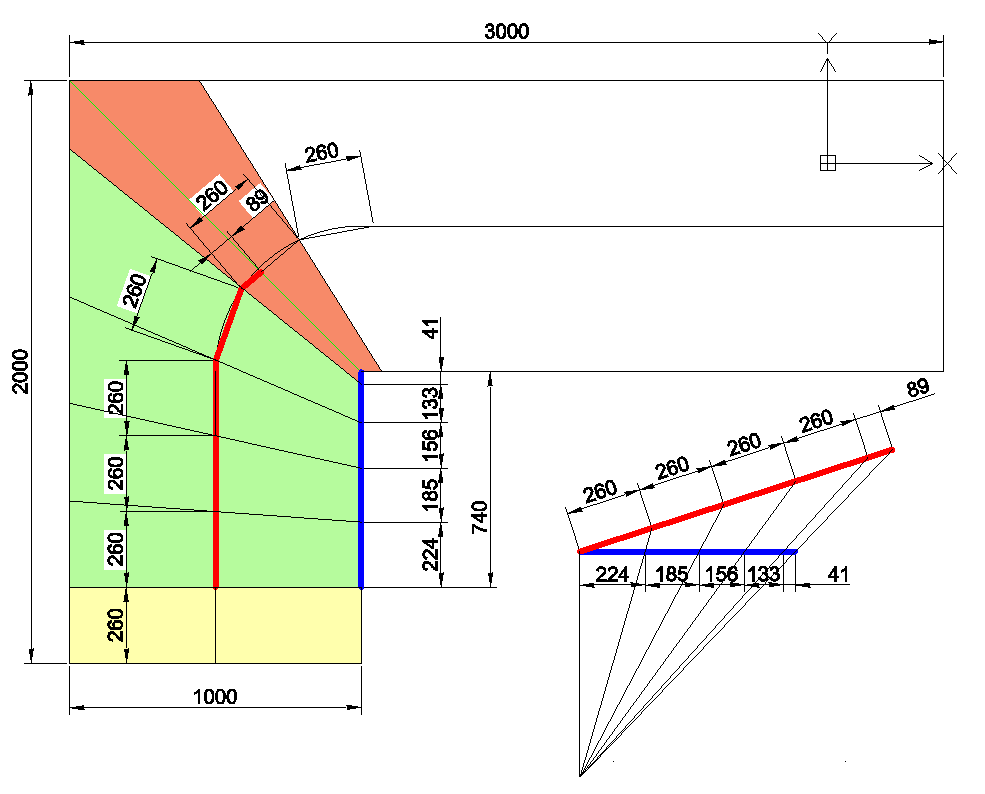
The winding is constructed from the total length of the walking line (red) and the total length of the narrow step sides (blue) in the winding area. The area before and after a pie step is considered separately.
Unlike most other methods, the step edges of the corner step do not need to be predetermined; they result constructively.
Draw an angle bisector into the corner. For non-symmetrical conditions, the tread of the corner step is distributed proportionally to one side or the other.
First draw a horizontal line equal in length to the sum of all narrow step sides in the winding area, usually from the last straight step edge to the corner (blue, 740 mm).
Then draw a line at about a 20° angle from the starting point. On this line, mark off the treads in the winding area, and finally proportionally the tread of the pie step (red, 1129 mm).
Now draw a vertical line downward from the starting point of the first line.
Then connect the last point on the slanted line with the endpoint of the horizontal line. Extend this line until it intersects with the vertical line.
Finally, connect all tread points on the slanted line with this single intersection point.
On the horizontal line, new intersection points are now created. With a compass or set square, transfer these into the floor plan so that the inner line with the narrow step sides (blue) is divided accordingly.
Finally, connect the entry points of the steps on the walking line with the determined points on the inside line.
Do the same with the second winding area after the corner.
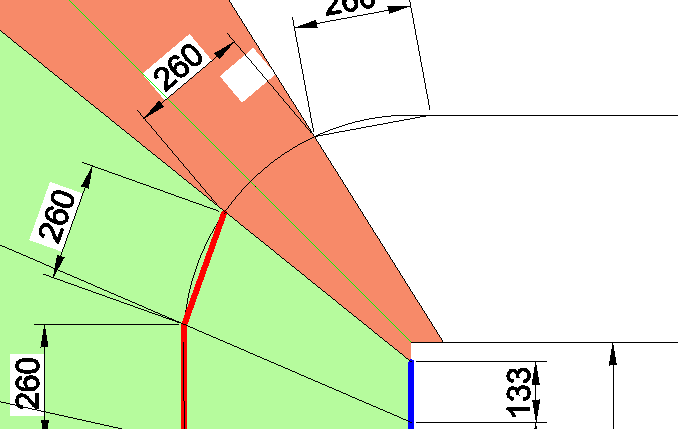
The back edges of the steps are drawn parallel to the front edges of the higher steps at the distance of the nosing. Done.
Specify the minimum tread of the corner step
If you want to specify the minimum tread of the corner step, first draw the corner step as desired, then simply shorten the red and blue lines as shown in the figure.
Similarly, other situations, such as with radii, can be handled. The angle method simply always divides a short line (blue) depending on a long line (red).